Monday, February 12, 2018

B-Roll Camera Shots

B-Roll Camera Shots


Left to Right "Slider" Shot:
Is a slide from left to right with smooth motion and no rotating of the camera, usually.
This shot requires: 
  • Camera w/ SD Card
  • Slider for best stability and movement. However you could use a stedi-cam and walk if its a longer shot or just shoot it and use "Warp Stabilizer" when editing.
  • Large depth of field
Left to Right "Rotating" Shot
Rotate while moving from left to right. Can move camera to rotate and see 180 degree view of subject. Goes from pointing out, to rotating in, to pointing out again.

Downward Zoom "Reveal" Shot
Moving forward and zooming in while also panning down to reveal subject. Every dramatic and adds a sense of nobility to subject by first pointing to the sky.

Straight Ahead Zoom Shot
I wouldn't use this shot in my film because it's more sophisticated and this technique is too much street style and rap music video ish. But maybe I can utilize it in a later film.

Horizontal Plane "Tracking" Shot
I would like to use a version of this shot in my film where I track down the length of a guitar shaft ti reveal Jacks hands strumming and then zoom out and rotate to his face so I will be combining both this shot and a Up to Down "Rotating" Shot.

Crane Shots

The camera is attached to a crane that can capture shots from high angles and either pan up or down or any combinations of shots. Can add a rally dramatic effect. One of my favorites is tracking the subject from behind then lifting up in a smooth motion to reveal landscape and location.

Ariel Shots
Drones or helicopters catch the entire setting of a scene from a birds eye view.

Tilt Shots
Tilt shots are when a camera moves up and down from a fixed axis. Usually tracking something with the movement, revealing an object, or casting away from a subject.

Tracking Shots
Shots in which the camera is on a track or something that allows the camera to follow a subject as it moves.

Rolling Shots
The camera moves diagonally making the image slanted and usually suggests intoxication.

Zoom Shots
Using the camera lens to zoom in and out. (zoom out and zoom in shots)

Panning Shots
Where the camera slowly moves side to side across a scene on a fixed set of axis.

Arc Shot
Using the camera in a circular motion around an object to show subject from all angles.
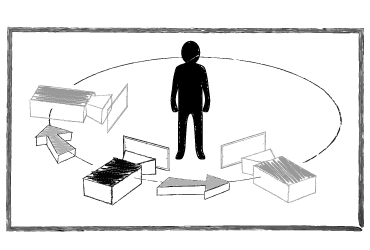
I made this to refresh my memory on the different shot types involving movement. I know all the still shots because we did them in previous classes but we never really studied movement. So above are a bunch of different shots that involve movement. I feel the use of movement enhances films and makes them look so much more professional that with still shots. Its more realistic to the human eye because we are never really looking at something completely still. Our breathing causes a constant rise and fall of our chest that then moves our heads and eyes as well. Without even realizing it we are constantly looking at things while moving. Therefore its only natural to have our cameras moving while making films. Its also more interesting because you see more from different angles than with a still shot. I'm not saying I'll never use still videos in my films because I am. I will Have three cameras set up in my interview on tripods and they will al be stationary. This is common in interviews because you usually only have one take so incorporating movement would be complicated and require man power I do not possess. But by contrasting movement with stillness in my film I will be able to differentiate the interview from the B-Roll and illustrate how Jack is always moving in his life, he's always doing something. And this interview is a moment in time when he is still so that footage will be still.

WorkLog:
Monday-Went in Lighting Studio and set up multiple cameras and messed around with lighting again
Tuesday- Talked with photography teacher to reserve lighting studio and what times and dates would work.
Wednesday- No school
Thursday- 2 hour delay, went in film studio and messed around with lights
Friday- Started sketching different B-roll shots I want to get

Monday, February 5, 2018

Tash Sultana Interview

Tash Sultana Interview Principles

Tash Sultana is an Australian multi-intrumentalist and singer-songwriter. She grew up in Melbourne and was gifted a guitar from her grandfather when she was three. this is when her music career started. From then on she learned to play numerous instruments, write songs, and sing. However, her life didn't come without struggle, she became addicted to drugs and partying and her career was damaged because of it. In this interview below she discusses her journey and the challenges she has overcome and the problems she has recognized to get past her faults. I wanted to write about this interview because I am hoping to do something similar to it with my Jack Life on ADD interview and needed something to base my editing and shot collection off of. Plus my Theme for this year is "Journeys" and this interview illustrates Tash Sultana's journey.


The first thing I noticed was that they did started the interview with her biggest struggle and that was dealing with drugs, so it really helped set the tone for the entire film. It is a two person interview and mine will not be like that but I love the background they use. She has lights framing her head that are blurred out and create a soft bokeh effect. And the interviewer has musical equipment in the back of his shot which shows her interests as well since she is a musician. All of this sets the tone for the viewers and visually gives an insight to who she is before she even tells us.

This is how I want my interview with jack to turn out, artistic and less tense. My previous film was fast paced with no space in between the words of the subject. In this interview there are pauses where B-roll footage just roles and soft music with her singing plays in the background. It's really moving and doesn't thrust a bunch of emotional banter in the viewers face but instead eases into the story and adds suspense. While collecting my B-roll I want it to look like this, dark color scheme, low lighting, lots of movement, different angles of the same shot, etc. I want to make a narrative almost and not just have my subject tell their story. My goal is to present their words with video that will evoke the emotions they are feeling into the audience, to support what they have to say and make it beautiful.

The B-roll is of her playing her instruments, showing segments of her youtube videos, and just illustrating a laid back, creative, and deep personality. The thumbnail for the video is a great example of the b-roll and was used a lot. It's of Tash singing and playing the guitar on a stage with a few scattered instruments but really dramatic lighting. The pointer light to the right adds the feeling of an onstage presence while also illuminating her hair and shoulder which gives an outline and distinction be tween her face/hair and the black background.


The editor also uses different color schemes to group shots and distinct them from one another. For example the interview part gives a warm feeling with her yellow hat, warm lighting, and orange bokeh and blur behind her. This gives comfort to the viewers and this shot is usually shown while she is speaking about harder and deeper topics. The b-roll of her on stage singing is a colder more washed out scheme and separates itself from the actual interview. It is usually accompanied by her actually singing and the sound of her voice and music. The pictures of her child hood are given a oink undertone to maybe display her innocence back then and contrast it to the woman who has made numerous mistakes and challenges she has dealt with. Then there is a black and white scheme which grouped together shows her numerous self recordings and adds a feeling of the past because thats what they are from.

Worklog:
Monday- looked at cameo effect
Tuesday- watched color correction video
Wednesday- researched lighting effects in after effects
Thursday- watched multiple interviews
Friday- watched Tash Sultana interview


Monday, January 29, 2018

Last of Pre-Production

This week I started my final stages of Pre-production. I focused on the lighting, camera angles, artistic principles of design, and the look I want to convey with this piece.  I decided to take a different approach to my sketchbook page and actually make it in my sketchbook. Above is a screenshot I captured from a youtube video interview and then took into Photoshop to point out how the different lights were affecting the subject. The right backlight adds light to the subjects left shoulder, neck and back of the head. The top light is at an angle so it lights up the back of the right shoulder, and the top of the hair, making a shadow with the bangs of the subject. The last light I think they used was a fill light that was low and pointed up from the viewers right side but the subjects left. I can tell because the face is softly illuminated which indicates a less harsh fill light. Also there is a shadow above the subjects left eye (reversed for viewer) that makes me believe the light is lower and pointed up. 
Below are my sketchbook pages in which I took the ideas I found throughout the week and combined them by drawing each camera set up and perspective out on a different page. Each page has three illustrations. 1, top left, is where the lights will be put based off of this specific camera angle as if I'm in the room and l am seeing the whole picture and not just what the camera sees. The second, bottom left, which shows a black box and inside is what I want the camera to actually capture, cropping out the set design and everything I don't want seen in the film. The third, bottom right, is of a birds eye view using symbols to represent the set camera, subject, lights, etc. each of these drawings is different because the camera that is being drawn and written about on each specific page is circled in blue pen accordingly. Along with the drawings I have written a few notes on the principle of design being used in the shot and other important things that translate to the illustrations. I am not quite sure about camera 3 yet. I was basing some of this from the knowledge off of what we learned last year with multicam editing. However, we did a two person conversation and the use of the right and left cameras were to get the same shot of the different subjects. But I am only using 1 subject and as I watch more interviews I am starting to realize that my 3rd camera angle should still be a zoomed out shot but maybe keep in on the right side with the rest of the camera to not disrupt the flow and switch up the views. I have not decided what I will do and this is probably the last decision I will make before actually filming my interview with Jack.


Worklog:
Monday: Presentations and notes
Tuesday: Presentation and notes
Wednesday: Presentation and notes
Thursday: researched lighting positions for multicam interviews
Friday: Started to plan out camera angles, lights, camera positions, and creative aspects of the interview.

Sunday, January 21, 2018

MP2 Presentation Summaries #1

MP2 Presentation Summaries #1


Ariel:
Ariel is working with photoshop to recreate photographs into digital paintings. She uses layers to switch on and off from photograph to painting in order to get the most accurate representation possible without actually copying it. She even switches over and uses the color dropper tool in order to get correct skin tone colors which helps make the process easier since skin is particularly hard to represent. I especially liked an idea Mr. Bomboy brought up after her presentation about taking 12 screen shots every second to get a stop-motion kind of effect (12 fps is usually recommended) and do quicker recreations of these screen shots, lining them back up in Premiere, and playing to get an animated drawing type effect from an actual video. This is definitely something I would like to pursue, even if its not this year. I love drawing and the idea of movement so I can use these to make unique animations. I could also use this technique to make a customized animated logo since I enjoy creating production logos.

Brennan:
Brennan is actually doing stop motion with clay and it looks absolutely phenomenal. He's made a few short videos and I'm hoping he makes a longer one for the arts fest at the end of the year. Once again this plays into what I discussed above with creating a stop motion type of animation from drawings and screenshots. Everything from these two projects ties into what Mr. Bomboy talked about and everything that I would like to do in the future.

Tuesday, January 2, 2018

Job Investigation

Job Investigation


Recently I’ve been extremely curious about the jobs available in the film industry and which one’s interest me and fit what I am looking to do when I’m older. I'll be going to college in a few months so I thought it was important for me to get a general understanding of what is out there. Below are a few of the jobs with descriptions and whether or not I am interested in pursuing them.

 Director- This person is responsible for everything that goes on while on set. Film Directors are at the top of the Production Pyramid and all artistic details are run through him/her. The Director is in charge of translating the script into the film the producer envisions. Directors need to have an in-depth knowledge of the technical aspect of filming and the artistic things including acting, set design, and everything else. This job takes a while to be good at since so much knowledge is needed and some of that knowledge I’m just not that interested in. I feel that Directing could come later in my career but initially I would not like to pursue it since it is so challenging.

Producer- This person has the most important role money making wise. They are in charge of finding a script and turning it into a movie on time and on budget. Some Producers double as a Director as well so the exact job of a Producer varies. They are responsible for all the off-set logistics that goes into bringing a film to life. This is a career I would like to pursue because I am really good with logistics and being a leader. Not only would I be in charge of the movie but I would also be able to share my ideas about what I want without having to have every little piece of knowledge in how to make my ideas come to life.


Set Designer- These people are in charge of blueprinting and constructing every set in a movie. They take rough drawings from producers and Directors and make them into a reality. I am slightly interested in this job because I like to make things and am good at it too. Also, it’s a job that requires a lot of problem solving, so each day is different and I bet I’d rarely get bored. I feel like it would be a good way to start in the industry.


Director of Photography- Also known as the Cinematographer this person is the right hand of the Director and is entrusted in bringing together the ideas and coordinating different departments like lighting, sound, camera operations, and talent. This is another big job but could also be a good starter. I could go to school at Tennessee and study Cinematography which is one of the majors they required and hopefully go right into working. It would also give me a good background of knowledge if I ever want to become a director or Producer.


Movie Editor- After Productions is wrapped, this person works through every shot and tape and formats them into a flowing narrative. They work in teams so they can consult with one another in order to find the best final cut. I have a good background on using editing programs so I would like to pursue this career. I’m not the best at taking the shots and camera settings and that stuff so this would let me use my skills that I already have.


Work Log:
This week I tried to coordinate when Jack and I will be filming and I sketched out a few shots and ideas for what I want to create. I also started another project in After Effects to make an animated production logo to put in before my film.

Tuesday, December 19, 2017

Color Correction & Color Grading

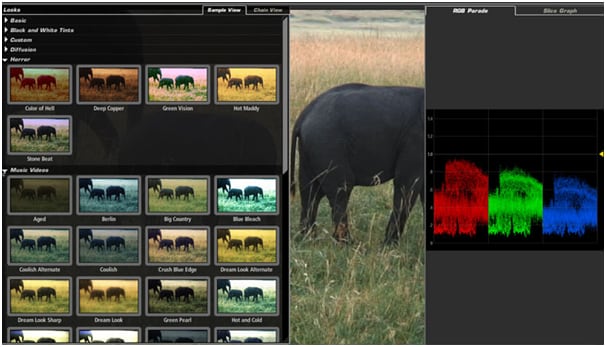
Color Correction is the process of changing every clip in a sequence to get good exposure and good Neutralization is the process with in this process when a clips colors are neutralized and flattened to allow an editor to color grade footage with a clean slate, bringing out the colors and schemes they want to instead of working with what is already there. Temperature is adjusted by implementing more orange to even out a cold bluish clip or vise versa, the allowing the editor to come in an give it the temperature they want to convey in the shot. Instead of editing footage based on how it appears to the human eye, SCOPES help show the balance of colors and contrast and make correcting easier by leveling out such features.
light.

Color Grading is done after color correction and is the creative process of adding and manipulating colors, lighting, and exposure again, but in this case instead of flattening and neutralizing, color themes, schemas, gradients, and more are introduced and give the footage a specific feel. This is a purely creative process and grading varies from editor to editor, but there are certain looks that give video certain feels such as using orange tints to convey warmth; increasing contrast to show suspense; adjusting lighting during a different type of day; and countless other possibilities.


Order of Operations:

1. Remove artifacts and de-noise.

2. Balance your shots by adjusting BLACKS/MIDS/WHITES, SATURATION and WHITE BALANCE.

3. Relight within a shot using power windows or masks.

4. Add gradients, diffusion and other lens filters.

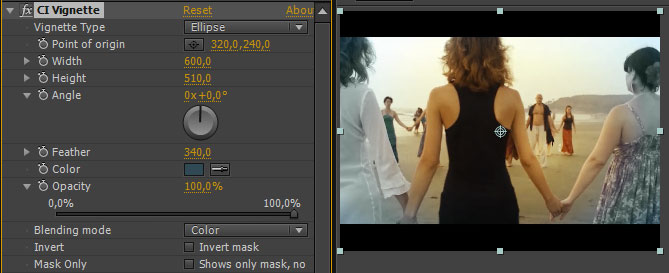
5. Add vignettes

6. Grade your images

7. Simulate a film stock of your choice

8. Resize and sharpen

Work Log:
I worked on animating and editing my outer space earth logo all week in Adobe Premiere Pro.