Thursday, April 5, 2018

MP3 Blog Post

Marking Period 3 Blog Post
Exploration:
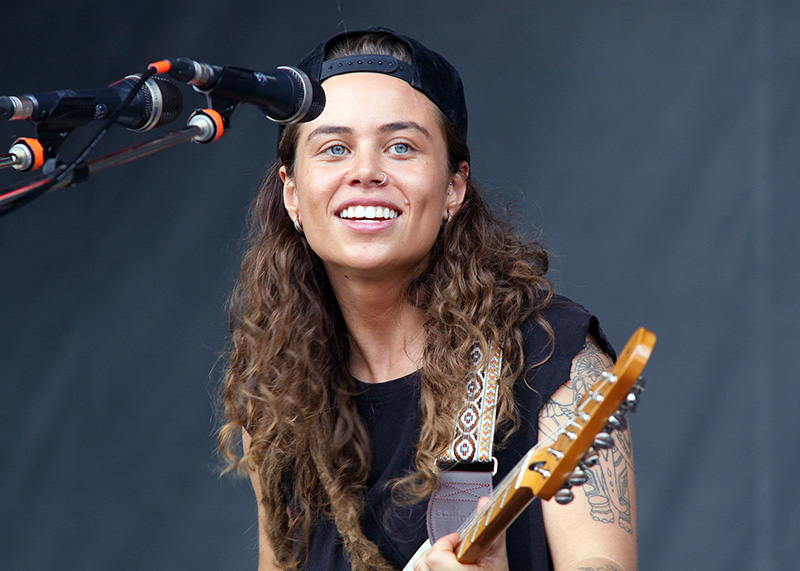
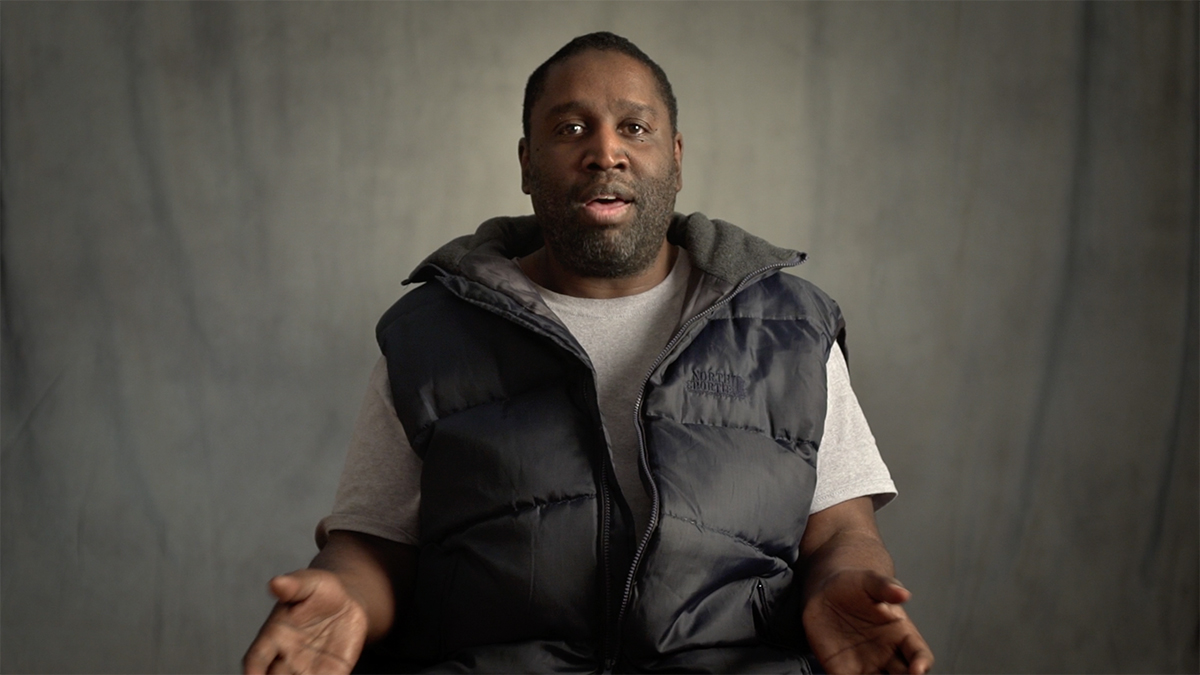
This Marking Period I worked on my Jack Shepely interview for my "life on ADD" video documentary series. I watched a particularly interesting interview with Tash Sultana, a musician who struggle with drug abuse, that really inspired the way I laid out and designed my interview. In this blog post I will go through my planning process, the production of the interview, and an evaluation of what I did this entire marking period.
Planning / Production:
I went into this project with almost every single detail planned out, even to the smallest detail like my camera settings and what Jack was wearing that day. The most useful thing I think I did was make a check list of the things I needed and the things I needed to do in order to shoot my interview correctly and not have to come back and film it again. The interview went smoothly and Jacks way of describing his life with Attention Deficit Disorder was inspiring and beautiful. Below is the checklist I made for the interview.
Checklist

  1. 3 cameras
  2. 3 batteries
  3. 3 SD cards
  4. 3 tripods (already in studio)
  5. Lav mic
  6. Set up cameras 1, 2, and 3.
  7. set up lighting- Soft Box- Back light
  8. White balance all cameras to the same piece of white paper.
  9. Adjust exposure so its the same on all cameras
  10. Set Movie Recording Size on all cameras to 1280x720, 60fps
  11. Plug in Lav Mic to camera 1
  12. Attach mic to subject
  13. Ask subject to speak normally
  14. Adjust Sound recording on camera 1- balance audio levels so they reach 12.
  15. Focus cameras
  16.  Start recording
  17. Ask initial Question
  18. Record interview


I printed out this check list and then wrote in the precise camera settings I need to set my cameras to in order for the best quality footage.
Some more pre-interview planning I did was workout where I wanted my cameras to sit in order to allow the multicam editing to flow and look professional. I ended up with three cameras and 3 different angles. Camera 1 was dead center with Jack focused on the center and symmetrical. Camera 2 was placed on my right but the subjects left and zoomed out more so some of the studio could be seen. Jack's left eye was at the right upper intersection point for rule of thirds and he was looking straight ahead. This angle was also at a greater angle than Camera 3. Camera 3 had a smaller angle and was placed on my left but Jacks right. This shot was in between Camera 1 and Camera 2. It wasn't in the center but it's angle wasn't as extreme as Camera 2's. It was a close up but not an extreme closeup like Camera one but not as zoomed out as Camera 2. This allowed me to get a variety of shots. Camera 1 really emphasized facial features and therefore the importance of the subject. Camera 2 gave viewers a look at the surroundings and included more of jacks body so viewers could interpret his body language and hand motions. Camera 3 gave a good medium so transferring in between shots was smoother.
Once I had planned, filmed, and downloaded my footage and audio onto my computer at home I began to storyboard my B-roll footage. I began with the intro and planned out how I wanted to start my interview, below is what i drew out.

Then I listened to the audio of Jack and drew in the angles for the interview shots based on his words and also B-roll shots I could get. I made it super detailed so I would know exactly what I needed to do when the time came to film the B-roll. I included the time in the audio sequence of when to switch shots from one to another or when to switch to/from B-Roll, and I included the times I needed to start playing my background music, when to pause my interview audio and let a B-roll sequence play, and when to resume everything. The times I wrote in the storyboard were followed by a word, that word corresponds with the audio and time and basically tells me to switch to that shot on that word in the interview audio when Jack says it. Thats how precise I made it. It was probably the most detailed and well thought out storyboards I've ever made. Below is the rest of the storyboard. I am missing the picture of the last five drawings but it isn't anything too special.

1

2

3

4

5

6

7

8

9

10

I also sketched out what I want my intro to look like and the different shots, angles, etc that I want to use

After I finished my storyboarding I downloaded my footage and audio into premiere and began to change the interview angles based on what and when my storyboard said. When I it came time in the sequence to switch over to B-roll or pause the interview audio I added in Legacy Titles that gave me instructions on what to do at that point. I also downloaded one of Jack's band's songs, Room by The Broken Straps, onto my computer and into the project. I got permission from the band to use it in my film. The I put it into my sequence at the place my storyboard told me and adjusted the interview audio and "Room" audio so that I could still hear jacks words.
Another thing I did was go into the EQ effect and messed around with the levels in order to get rid of the background noise and hum while also not warping jacks voice.

Another thing I needed was an actor release form. This was especially important because if the film turns out well then I may enter it in some film festivals over the summer. I need a contract to make sure there will be no legal issues with him and his band using his words and their music in the future. Below is the actor release I got him to sign.


Here are so more things I learned and researched throughout the last few months:


Flat Shots = Profession

Flat footage does not look good right off the back but it makes editing in post production much easier because you are not restricted by colors, exposure, or contrast that get in the way when you aren't filming in a flat picture profile.

Sharpening too much in post production can create lumpy footage.


Depth of field:
The smaller the depth of field the blurrier the background and the more cinematic.


Evaluation:
Overall I think I did a lot this marking period and I learned a lot too. the biggest thing I learned was the importance of planning. All of that planning allowed me to edit the footage I had in Premiere Pro so much more effectively and efficiently. The only thing looking back that I think could have been better was setting up the dates to shoot. I went to the studio and planned to film jack 5 different times before we finally coordinated correctly. I probably could have been done with the project by now and started something new if everything went accordingly on those days. 3 out of the 5 times jack wasn't in school and forgot to tell me so I set up for the interview and didn't shoot anything. However, it made great practice and I had it down when he finally showed up. Another problem that occurred was that yearbook needed to use the studio the other two times even though I tried to schedule around them. Over all I think everything else went well, I incorporated new techniques i learned, planned well, and am now in post production.


Video:
Below is the organization video that i previously talked about. It is the interview without the B-roll and I put in legacy titles to show what to do/add/delete when I finally get the rest of my footage.

Start 1:12
End 4:44

Thursday, March 8, 2018

Sharpness and Quality

Sharpness and Quality Investigation


Things to Remember to Get Crisp Footage:
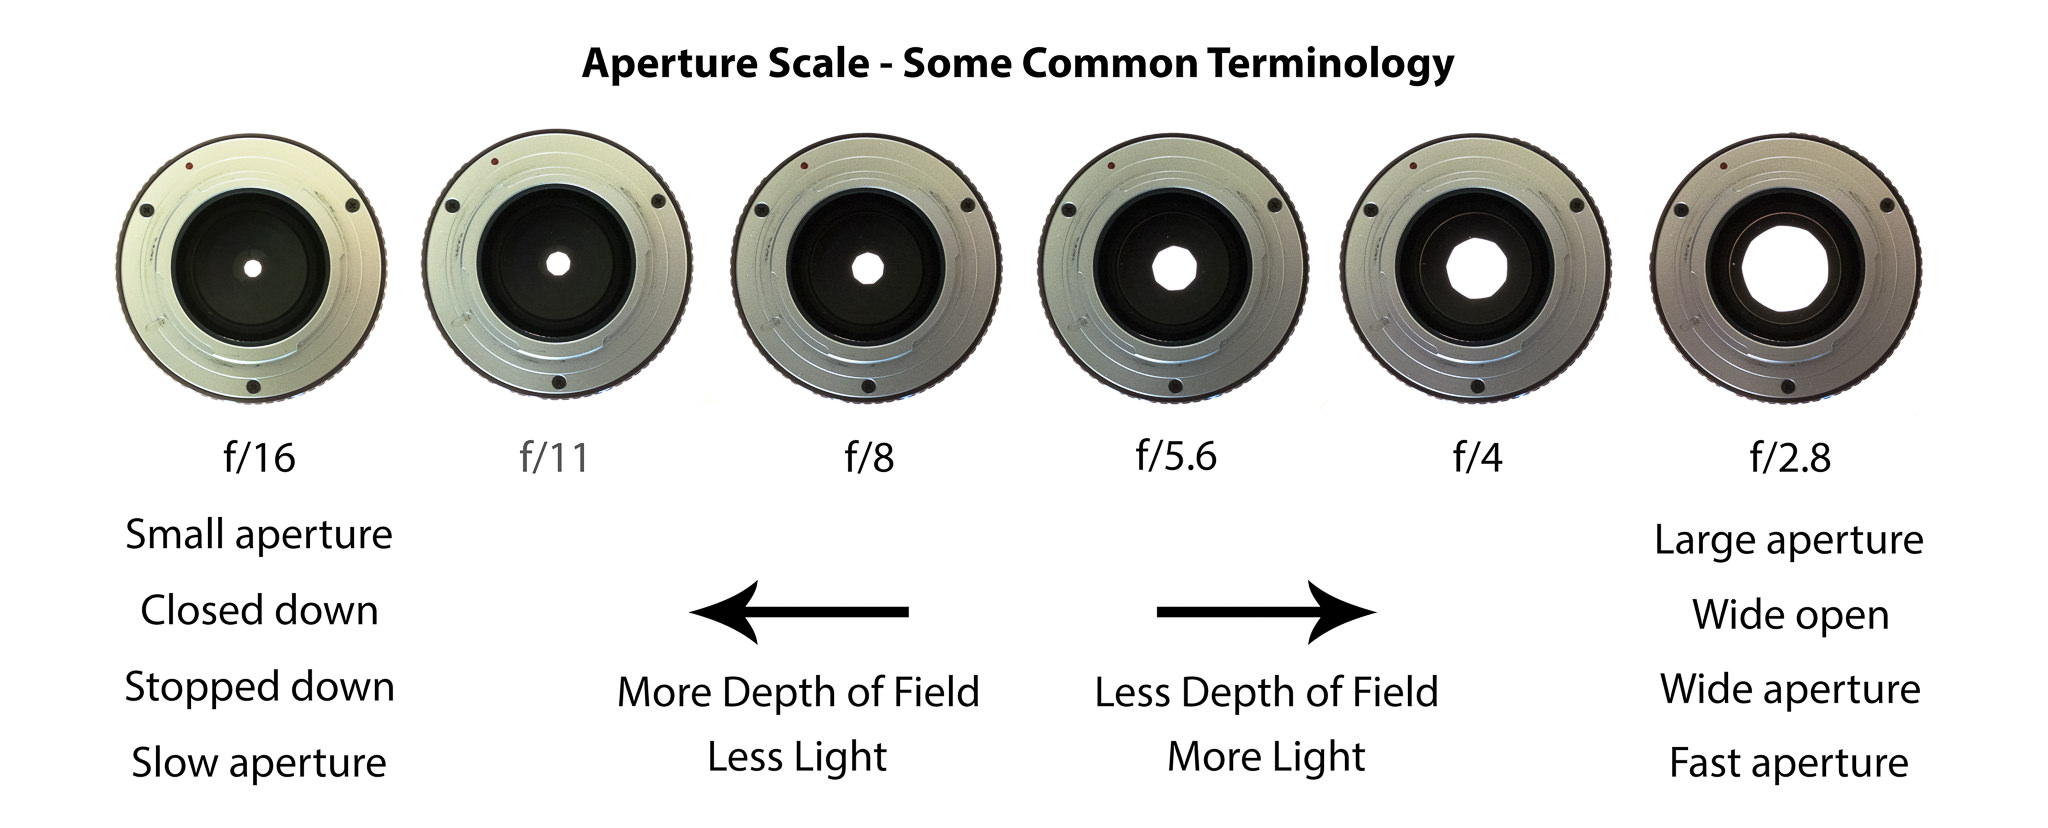
  • First control the focus area of the camera. Shallow depth of field will help produce a sharper image with a blurred background and give a nice cinematic look.
  • However, if you need an establishing shot or a clip with a wide depth of field, it is crucial to have the Aperture at F/8 or higher. This way enough light will come into the camera sensor and the whole shot is visible.
  • A big mistake cinematographers make is using the in-camera sharpness setting. This creates image grain and noisy footage and even a loss of detail. This will also make any coloring or visual mistake in the clip harder to correct in post production.
  • Its important to film in a flat picture profile. I personally have already downloaded a C-log picture profile onto my camera at home to really help me get flat footage. Lots of cameras don't have a C-log picture profile but you can still get flat footage by lowering sharpness, contrast, and saturation in your settings. I don't know if Bomboy's cameras have C-log.
  • Flat Shots = Profession
  • Flat footage does not look good right off the back but it makes editing in post production much easier because you are not restricted by colors, exposure, or contrast that get in the way when you aren't filming in a flat picture profile.
  • Sharpening too much in post production can create lumpy footage.
  • Keep editing simple and use a high bitrate when exporting footage (minimum of 25mps)
  • When it comes to lens you are going to want a wide aperture usually between F/1.2 - F/2.8 in order to get crisp cinematic shots.
  • Aperture, Iso, and Shutter Speed are EVERYTHING. 
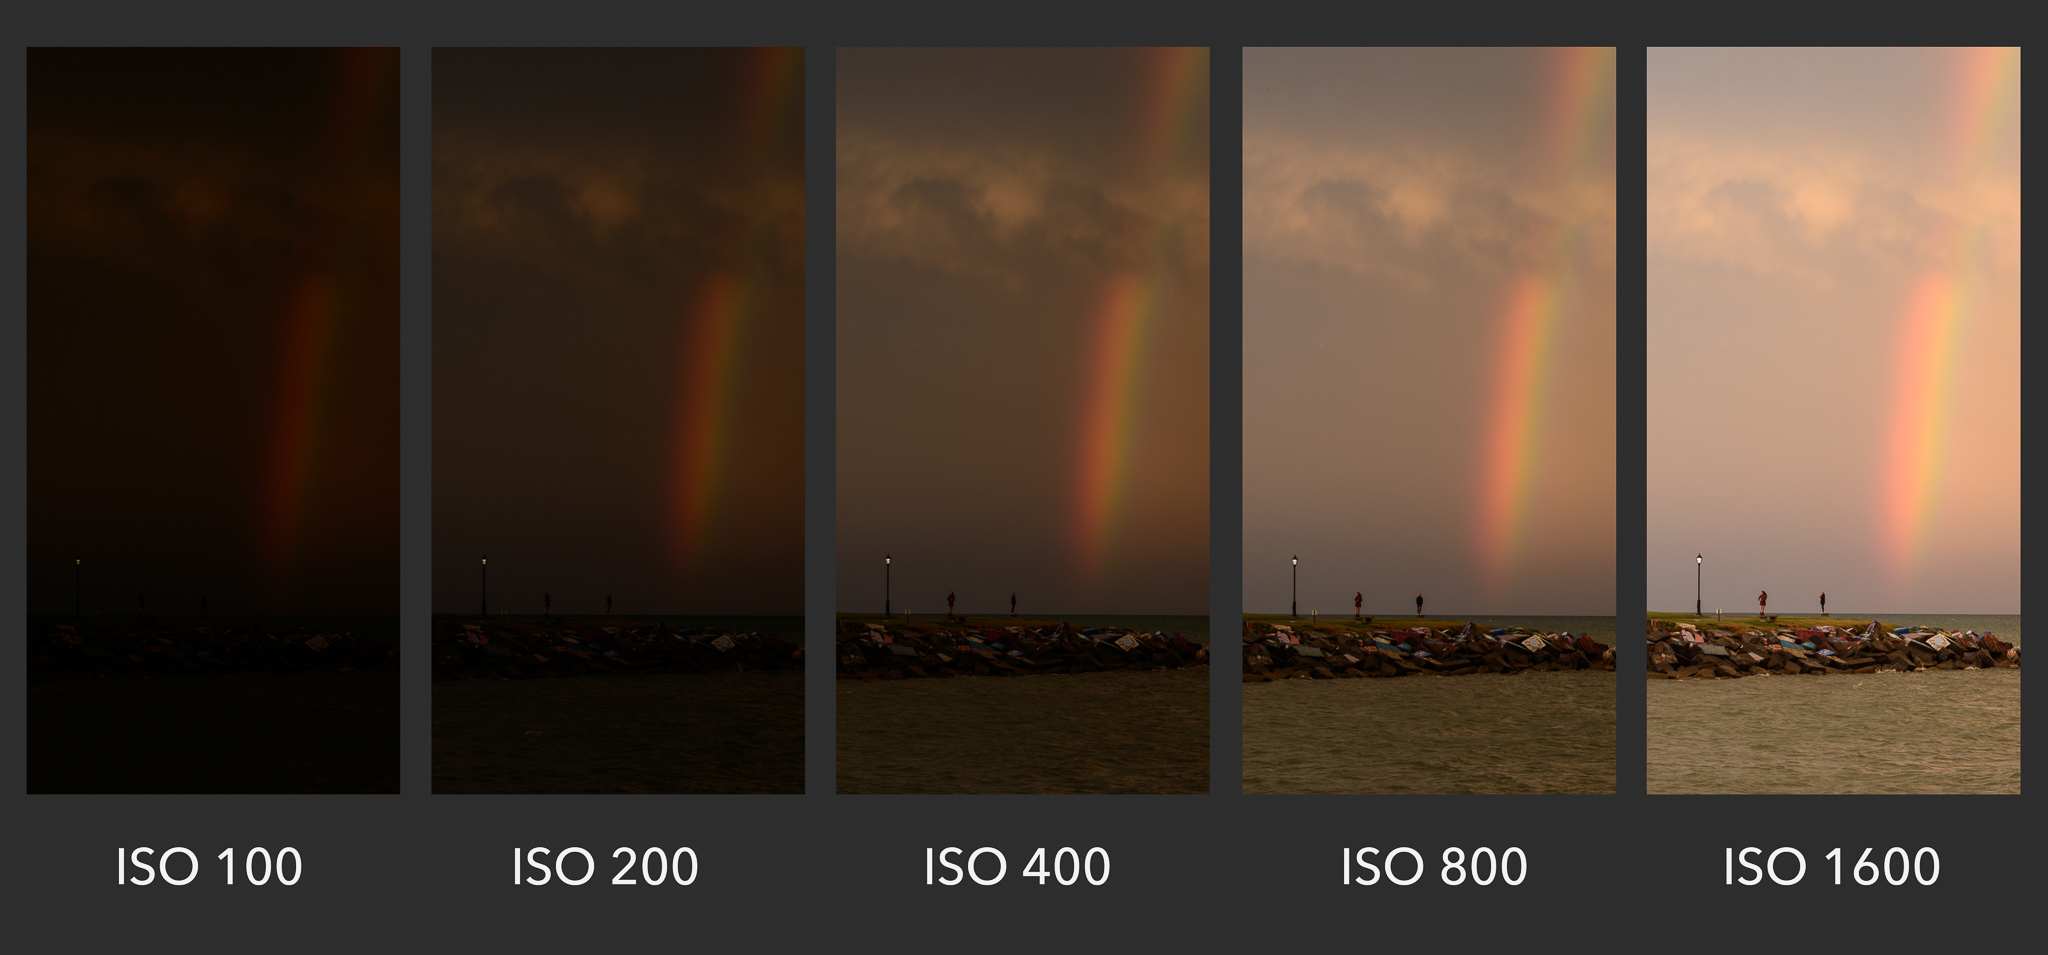
  • Higher ISO = Brighter. But using high ISO is risking getting Image grain.
  • Lower ISO = Dark. Increases contrast and risks getting image grain 
  • It's all about knowing your camera and getting the perfect ISO, Aperture, and Shutter Speed levels.
  • 1/50s recommended for 24fps (Shutter Speed)
  • You can change Exposure with both ISO and Aperture.
    • F/22 = Dark with deep depth of field.
    • F/2.8 = Bright with shallow depth of field.
  • Usually best to stay below ISO 1600 or else footage will be grainy.
  • When shooting in the dark:
    • Shoot with Aperture of F/2.8 and ISO 1600
    • Grainy footage = Over Exposed
    • Flickering = Wrong Shutter Speed
  • In post production you can get rid of some image grain by lowering highlights a little.

Monday, March 5, 2018

Storyboarding Investigation 2

Storyboarding Investigation 2

The History Of Storyboards
Walt Disney animator Webb Smith first used storyboarding during the early 1930s. Smith used the idea of drawing scenes of the Disney short “The Three Little Pigs” on separate sheets of paper and pinning them up on a bulletin board to tell the story in sequence. One of the first live action films to be completely storyboarded was “Gone with the Wind”. Storyboarding became popular in live-action film production during the early 1940s, and became standard for the previsualization of films. Today it is an expected part of the pre-production process. Storyboards can also assist people working on the set of a film, to see exactly what will be happening in the scene. Some directors, such as Martin Scorsese, use storyboards for the majority o

a
f their films. Other directors, such as the Coen brothers, have a storyboard artist on staff to create storyboards for every shot. Other directors may use storyboards only for complex action scenes. What is seen on a storyboard must be consistent with what is happening in the shot. For example, if you envision a close up shot of someone’s face, the storyboard should show the person’s face very close up; the face should fill most of the screen. Storyboarding helps you visually see how your shots will fit together. Remember, if you don’t understand the message, no one will. Creating a storyboard is a major part of the pre-production process and will aid in organizing your ideas, making sure that the audience understands your intent. Shot selection , camera movements, and audio notes on the storyboard also help the audience understand your intent.

The Style Of Storyboards 
There are multiple styles of storyboarding but simple sketching is good for a beginning storyboard artist. There are a few ways to build one, either with pencil and paper, or on the computer, but it really all depends on your need and skill level. Depending on the time frame of the production, you can gauge how much detail is needed on the board. Often times simple sketches are able to communicate the story. Although more detailed storyboards typically leave your audience with a greater understanding of your story and goals.

Below are my storyboards so far. I added times on them because I have an audio recording from Jack's interview so I was lining up my shots with what he was saying.

1

2

3

4

5

6

7

8

9

Worklog:
Monday- Storyboarding
Tuesday- Color correcting footage
Wednesday- Degraining and Denoising footage
Thursday- Cleaning up and assembling clips
Friday- Storyboarding B-roll.

Tuesday, February 27, 2018

StoryBoard Investigation

Storyboarding

Last week I finally filmed to study portion of my interview which includes the audio that will be used in the entire film. It took me about 6 attempts to organize everything and finally shoot the multi-cam sequence that included 3 cameras all at different angles, 4 light fixtures, a white backdrop, and my subject. I organized everything from bringing in 3 SD cards, getting all the equipment from the TV Studio to the Light Studio, white balancing, adjusting exposure and aperture,  making sure my image size is the same in all my cameras, setting up the mic, adjusting audio levels, moving around lights, making sure the studio was clear of all other people, and so much more. So it was a major relief to get that out of the way and to finally start working on storyboarding my B-roll. Below is a little investigation on Storyboarding.

Storyboards are a drawn version of the movie and serve as the blueprint for the action and dialogue. Each storyboard artist receives script pages or a "beat outline", a map of the characters' emotional changes that need to be seen through actions. Using these as guidelines, filmogaphers and actors gather a general idea of the story they are trying to depict and transfer it from paper to the screen. It allows the story teller, script writer, or director to show the rest of the staff what they envision the film to be like in a visual way. Hundreds to thousands of storyboards can be drawn up for a movie, sometimes they are just thrown away and the artist starts over again.

Storyboards are used to create story. A storyboard originates from written word; for example from a script. A storyboard artist takes the written word and draws it into pictures. The pictures are then taken and pinned on a board, a storyboard. After all the pictures are pinned to a storyboard, the artist then pitches it to the director. The artist wants to give a sense of what this movie could be like and tries to bring it to life. The aim of a storyboard is to get a feeling of what the story could be like as a final film. The storyboard artist attempts to convey what it would feel like to watch the film in a cinema.

According to YouTube, online videos range in length, anywhere from 42 seconds to over 10 minutes. On average, most fall between 2–4 minutes. Keeping viewers’ attention for that long — especially in this day and age — is incredibly hard to do.B-roll can help. B-roll is the extra footage that surrounds an interview. It’s critically important to plan out this supplemental footage when storyboarding and editing a film. The extra footage can provide different perspectives and dimensions to a story, engage viewers visually and keep their attention in check.Without b-roll, interview-style videos would be dependent on chronological and seamless responses, making it hard to edit out unwanted content. Capturing peripheral shots will help you avoid underwhelming talking head footage — scenes where the main action involves someone talking either right into the camera or just to the side of the camera — and provides editors more options for voiceovers to visually piece together the best story possible.
And b-roll can be just about anything — a stationary shot of leaves swaying in the wind, a moving shot rolling over photographs on a desktop, an over-the-shoulder shot of someone rocking in a chair, historical news clips, vintage videos or timelapses. The options are endless, but they must be relevant to the story you are trying to tell.

I started to story board my B-roll footage and am including times I want to switch clips based on my audio. I also have been including pauses that I will be playing music and further illustrating Jack's words before he resumes talking. Im incorporating a lot of smooth motion and movement to give a more professional look instead of the amateur  interview I put together at the beginning of the year. I've been using the "Tash Sultana" interview as a frame of reference since both interviews are about musicians.

Worklog:
Monday-No School
Tuesday- Reserved studio, Messed around with lighting and camera settings
Wednesday- Went over shooting checklist for filming
Thursday- Filmed interview and cleaned up the audio grain
Friday- Messed around with color correction and started b-roll storyboard

Tuesday, February 20, 2018

Reference Sheet

Reference Sheet
Camera Angles
Camera 1 View:
  • Centered
  • Symmetrical
  • Looking Straight on as if Talking to the audience.

Camera 2 View:
  • Side view Close-Up / Extreme Close-Up
  • Shallow depth of field
  • Looking off to left
  • Rule of thirds 
  • Rule of thirds intersection on eye

Camera 3 View:
  • Zoomed out
  • side angle
  • object (Soft Box) obstructing some part of frame
  • Zoomed out a little. In between distance of Camera 1 and Camera 2.
  • Medium Depth of Field
Camera Settings Cheat Sheets

Pre Interview Checklist
  1. 3 cameras
  2. 3 batteries
  3. 3 SD cards
  4. 3 tripods (already in studio)
  5. Lav mic
  6. Set up cameras 1, 2, and 3.
  7. set up lighting- Soft Box- Back light
  8. White balance all cameras to the same piece of white paper.
  9. Adjust exposure so its the same on all cameras
  10. Set Movie Recording Size on all cameras to 1280x720, 60fps
  11. Plug in Lav Mic to camera 1
  12. Attach mic to subject
  13. Ask subject to speak normally
  14. Adjust Sound recording on camera 1- balance audio levels so they reach 12.
  15. Focus cameras
  16.  Start recording
  17. Ask initial Question
  18. Record interview
WorkLog:
Monday- Worked on Day of Production Spread Sheet
Tuesday- Worked on Day of Production Spread Sheet
Wednesday-Went to another classroom to take test
Thursday- absent
Friday- absent


Monday, February 12, 2018

B-Roll Camera Shots

B-Roll Camera Shots


Left to Right "Slider" Shot:
Is a slide from left to right with smooth motion and no rotating of the camera, usually.
This shot requires: 
  • Camera w/ SD Card
  • Slider for best stability and movement. However you could use a stedi-cam and walk if its a longer shot or just shoot it and use "Warp Stabilizer" when editing.
  • Large depth of field
Left to Right "Rotating" Shot
Rotate while moving from left to right. Can move camera to rotate and see 180 degree view of subject. Goes from pointing out, to rotating in, to pointing out again.

Downward Zoom "Reveal" Shot
Moving forward and zooming in while also panning down to reveal subject. Every dramatic and adds a sense of nobility to subject by first pointing to the sky.

Straight Ahead Zoom Shot
I wouldn't use this shot in my film because it's more sophisticated and this technique is too much street style and rap music video ish. But maybe I can utilize it in a later film.

Horizontal Plane "Tracking" Shot
I would like to use a version of this shot in my film where I track down the length of a guitar shaft ti reveal Jacks hands strumming and then zoom out and rotate to his face so I will be combining both this shot and a Up to Down "Rotating" Shot.

Crane Shots

The camera is attached to a crane that can capture shots from high angles and either pan up or down or any combinations of shots. Can add a rally dramatic effect. One of my favorites is tracking the subject from behind then lifting up in a smooth motion to reveal landscape and location.

Ariel Shots
Drones or helicopters catch the entire setting of a scene from a birds eye view.

Tilt Shots
Tilt shots are when a camera moves up and down from a fixed axis. Usually tracking something with the movement, revealing an object, or casting away from a subject.

Tracking Shots
Shots in which the camera is on a track or something that allows the camera to follow a subject as it moves.

Rolling Shots
The camera moves diagonally making the image slanted and usually suggests intoxication.

Zoom Shots
Using the camera lens to zoom in and out. (zoom out and zoom in shots)

Panning Shots
Where the camera slowly moves side to side across a scene on a fixed set of axis.

Arc Shot
Using the camera in a circular motion around an object to show subject from all angles.
I made this to refresh my memory on the different shot types involving movement. I know all the still shots because we did them in previous classes but we never really studied movement. So above are a bunch of different shots that involve movement. I feel the use of movement enhances films and makes them look so much more professional that with still shots. Its more realistic to the human eye because we are never really looking at something completely still. Our breathing causes a constant rise and fall of our chest that then moves our heads and eyes as well. Without even realizing it we are constantly looking at things while moving. Therefore its only natural to have our cameras moving while making films. Its also more interesting because you see more from different angles than with a still shot. I'm not saying I'll never use still videos in my films because I am. I will Have three cameras set up in my interview on tripods and they will al be stationary. This is common in interviews because you usually only have one take so incorporating movement would be complicated and require man power I do not possess. But by contrasting movement with stillness in my film I will be able to differentiate the interview from the B-Roll and illustrate how Jack is always moving in his life, he's always doing something. And this interview is a moment in time when he is still so that footage will be still.

WorkLog:
Monday-Went in Lighting Studio and set up multiple cameras and messed around with lighting again
Tuesday- Talked with photography teacher to reserve lighting studio and what times and dates would work.
Wednesday- No school
Thursday- 2 hour delay, went in film studio and messed around with lights
Friday- Started sketching different B-roll shots I want to get

Monday, February 5, 2018

Tash Sultana Interview

Tash Sultana Interview Principles

Tash Sultana is an Australian multi-intrumentalist and singer-songwriter. She grew up in Melbourne and was gifted a guitar from her grandfather when she was three. this is when her music career started. From then on she learned to play numerous instruments, write songs, and sing. However, her life didn't come without struggle, she became addicted to drugs and partying and her career was damaged because of it. In this interview below she discusses her journey and the challenges she has overcome and the problems she has recognized to get past her faults. I wanted to write about this interview because I am hoping to do something similar to it with my Jack Life on ADD interview and needed something to base my editing and shot collection off of. Plus my Theme for this year is "Journeys" and this interview illustrates Tash Sultana's journey.


The first thing I noticed was that they did started the interview with her biggest struggle and that was dealing with drugs, so it really helped set the tone for the entire film. It is a two person interview and mine will not be like that but I love the background they use. She has lights framing her head that are blurred out and create a soft bokeh effect. And the interviewer has musical equipment in the back of his shot which shows her interests as well since she is a musician. All of this sets the tone for the viewers and visually gives an insight to who she is before she even tells us.

This is how I want my interview with jack to turn out, artistic and less tense. My previous film was fast paced with no space in between the words of the subject. In this interview there are pauses where B-roll footage just roles and soft music with her singing plays in the background. It's really moving and doesn't thrust a bunch of emotional banter in the viewers face but instead eases into the story and adds suspense. While collecting my B-roll I want it to look like this, dark color scheme, low lighting, lots of movement, different angles of the same shot, etc. I want to make a narrative almost and not just have my subject tell their story. My goal is to present their words with video that will evoke the emotions they are feeling into the audience, to support what they have to say and make it beautiful.

The B-roll is of her playing her instruments, showing segments of her youtube videos, and just illustrating a laid back, creative, and deep personality. The thumbnail for the video is a great example of the b-roll and was used a lot. It's of Tash singing and playing the guitar on a stage with a few scattered instruments but really dramatic lighting. The pointer light to the right adds the feeling of an onstage presence while also illuminating her hair and shoulder which gives an outline and distinction be tween her face/hair and the black background.


The editor also uses different color schemes to group shots and distinct them from one another. For example the interview part gives a warm feeling with her yellow hat, warm lighting, and orange bokeh and blur behind her. This gives comfort to the viewers and this shot is usually shown while she is speaking about harder and deeper topics. The b-roll of her on stage singing is a colder more washed out scheme and separates itself from the actual interview. It is usually accompanied by her actually singing and the sound of her voice and music. The pictures of her child hood are given a oink undertone to maybe display her innocence back then and contrast it to the woman who has made numerous mistakes and challenges she has dealt with. Then there is a black and white scheme which grouped together shows her numerous self recordings and adds a feeling of the past because thats what they are from.

Worklog:
Monday- looked at cameo effect
Tuesday- watched color correction video
Wednesday- researched lighting effects in after effects
Thursday- watched multiple interviews
Friday- watched Tash Sultana interview