Life on ADD: Jack Shepley
Thursday, May 10, 2018
Tuesday, May 8, 2018
Themes and Focus Throughout the Year
Artist Statement
In the beginning of the year I explored Propaganda films because I wanted to make art that would leave an impact on viewers and force them to rethink their previous beliefs. However, I have adapted this idea throughout the year. I started off with interviewing my Mother who has ADD but had overcome her challenges with the disorder and is now a CEO of a multimillion dollar corporation. Doing an interview on such an influential human being while also discussing a topic that hit home to me really ignited a creative spark inside me. I have severe ADD so hearing, recording, and presenting other stories of living with the disorder left me feeling confident that I can rise above adversity too. Thus my Life on ADD series was born.
The first video in my series was not well done. I had these glorious ideas but not enough organization, planning, or background knowledge to follow through with my plans. It wasn't bad, there were some great technical aspects of it, but many many poor qualities and mistakes. My lighting set up was advanced, with a background light that gave dimension to the room and depth behind my subject. However, I used a shot put mic instead of of lav mic and the sound was horrendous. There was static in the audio that I tried to minimized by adding a reducing effect to the audio in After Effects. This left the audio warped, the levels out of wack, and the static not completely gone. This made the whole film seemingly less professional. After coming out with my first film this year I dedicated 2 Marking Periods to research. I planned on doing a documentary styled interview on a fellow classmate, Jack Shepley, and wanted it to turn out better than my previous one. So I planned, sketched, researched, ran through techniques, familiarized myself with my camera, installed C-Log and LUTS, and so much more. My interview set up was a lot more complex. I did a 3 camera multi-cam set up with all different angles, 3 point lighting including a backlight, and a lav mic that recorded him speaking and was attached to his shirt. I also typed up and printed out a checklist that made setting up so much easier. It included things like; white balancing all the cameras, adjusting and synchronizing exposure, clapping to help match audio in post production, ect. The whole process went a lot smoother than before and the footage and audio came out a million times better. Using a multi-cam set up allowed to to seamlessly switch angles in post production which helped hold viewers attention and adds a level of sophistication to the film. I also dedicated an entire day to shooting B-Roll footage with him. I planned out my shots on a story board and even got a fog machine to help reflect the light. The fag machine B-Roll footage is some of my best work. I also used a customized LUT Plug in for my B-Roll C-Log footage. It takes the C-Log footage, which is basically a setting that desaturates and flattens footage while you are taking it subsequently allowing a wider range of color grade possibilities, and adjusts some of my color grade settings for me and increases my red and blue values. I really liked this LUTs because I had the ability to make it my own by manually adjusting some of the settings. This too improved my film past the standard set by my previous documentary.
Overall, this year was one of major personal and artistic growth. I have learned so much and advanced my skills past my previous amateur level. I finally have the background knowledge to make my insane ideas come to life through film, the organization to work efficiently, and the imagination that sets me apart from others. At the end of this school year I have adapted my theme from Propaganda to Journeys. I have realized I don't want to change other peoples opinions, I believe everyone's opinions should be unique, but I do want to educate and illicit emotion from my viewers. In my series I illustrate the journey my subject has been on, the journey of life, and more specifically, their journey dealing with ADD. Their struggles only crown their victory because they triumphed passed seemingly impossible struggles in order to become a better person and succeed in life.
Monday, April 30, 2018

Monday, April 23, 2018
Histograms
Histograms
What is a Histogram?
A histogram is a graph that shows the frequency distribution of an image's data values, which makes it convenient for checking an image's brightness or darkness or the trends in the colors it uses. Certain cameras, like dslrs, have settings that bring up histograms and allow videographers and photographers to adjust their light and color levels. Histograms measure
- Brightness Display:Trends in exposure levels and overall gradations
- RGB Display:Color saturation and gradation
How to Read Them:
Histograms show the distribution of light in an image as a graph of light along the horizontal axis (Left: Dark; Right: Bright) and a stack of the number of pixels at each level of brightness along the vertical axis.
Within the screen, the peaks in the graph will skew more to the left the greater the dark components of the image there are, and will skew more to the right of the graph the greater the bright components of the image there are. Components up against the left edge of the horizontal axis are crushed blacks, and components up against the right edge are blown highlights. The components in other areas reproduce gradations.
By looking at an image and its histogram, you can check the exposure level and the overall gradation in the image.


RGB Histogram:
These histograms work the same way as the above ones, except they measure the light levels of the Red, Green, and Blue colors. The colors are along the vertical axis and the number of pixels at each level of brightness is on the horizontal axis.

Why use a Histogram?
Often, I am shooting outside and it is very bright so the LED screen on my camera is hard to see. This makes these shots highly susceptible to over exposure because I can't clearly see how my adjustments are effecting the shot. The Histograms give a clear representations of my exposure and saturation and are easy to read in the sun light. This also allows me to not just eye ball a shot but also make sure, my pixels are not overly white or overly black. This is super important in postproduction because when pixels are white or black there is nothing you can do to change them, they will only stay white and black. So when you have too many white or black pixels (over exposed or under) there is absolutely nothing you can do about it and the footage is useless.
Worklog:
Monday-Prepared to shoot for Wednesday
Tuesday- Prepared to Shoot for wednesday
Wednesday- Printed out checklist and tips
Thursday- Overviewed footage I shot on Wednesday
Friday- Tried to correct under exposure in some of my shots.
Worklog:
Monday-Prepared to shoot for Wednesday
Tuesday- Prepared to Shoot for wednesday
Wednesday- Printed out checklist and tips
Thursday- Overviewed footage I shot on Wednesday
Friday- Tried to correct under exposure in some of my shots.
Monday, April 16, 2018
MP3 summary and critic
What I've Learned Through the Critiquing Process
 One of the most important things I learned is that criticism is so valuable because if we stay contempt with ourselves then we will never improve. So, as a student in a class with other kids who's artistic goals are similar to mine, I had a duty this year to push them and help them succeed and not stay complacent. Reviewing each others blogs and marking period posts allowed communication and ideas to flow from one student to another. It was like our own little creative circle where we could teach each other how to do things, inspire our peers with our work, and open each others minds to arts infinite possibilities. Criticism was taken fairly well when I gave it to the other film group, and when my color grading was not the best, I studied and researched ways to improve myself and learn from my mistakes.
Below is a summary of Kaila's Marking Period 3 Blog post.

Kaila turned her voodoo doll comics into a short animation. The animation showed "Vincent the voodoo doll" walking down a city street and meeting a friend. The animation look surprisingly accurate to her blender comic drawings. not only did she animate camera movements, the characters, and the streets, but she added texture to the pavement, the brick walls, windows, doors, etc. My favorite was how she made a few neon light signs along the buildings. It brought a layer of color and made the animation look more real and sophisticated.
Along with the animation she continued to draw out more comics of Vincent and his adventures.
What I learned from her presentation is that I am not the only one who learned through youtube tutorials. She learned all about the animation process from youtube and that is pretty challenging considering she is use to stationary, still art work. I was use to photography but then I learned how to film, animate texts and film, apply special effects, and so on. It's comforting knowing other people in this class have started from the beginning too. I feel like there is so much talent in this classroom and my brain can't even comprehend how some of these kids make their art, so it's nice knowing that they all started from somewhere too. Another thing I noticed was that Kaila's comics were really similar to storyboards, which are something I make. She drew out her ideas and used technology to make a moving representation of her drawings. So, it's funny how different factions in art still use the same principles and technique because art is universal and what is visually pleasing to the human eye doesn't change based on the type of art. Rule of thirds is used in photography, video, painting, drawing, and practically everything because its a universal principle. Being able to see other students using the same principles, techniques, ideas, and methods as me has opened my eyes to arts infinite possibilities.
Worklog:
We watched presentations all week. I took notes on everyone's art work and progress along with being involved in critiquing, asking questions, and learning from my peers.
Sunday, April 8, 2018
Color Correction and Color Grading
Color Correction and Grading
What is it?
Color correction is a step in the post production progress in which numerous effects including exposure, contrasts, and color levels, are adjusted in order to balance the footage's color and color of the light. This step widens the options of an editor has during the Color Grading step.
Color Grading is the next step when an editor alters and enhances numerous settings (like the ones above) with the intent to give an artistic presence to that particular clip. Each editor has its own style of color grading and different color grades can be specific to moods that the direct wants to be set in the film.
Color Grade Examples:
 "Orange and Teal Look"
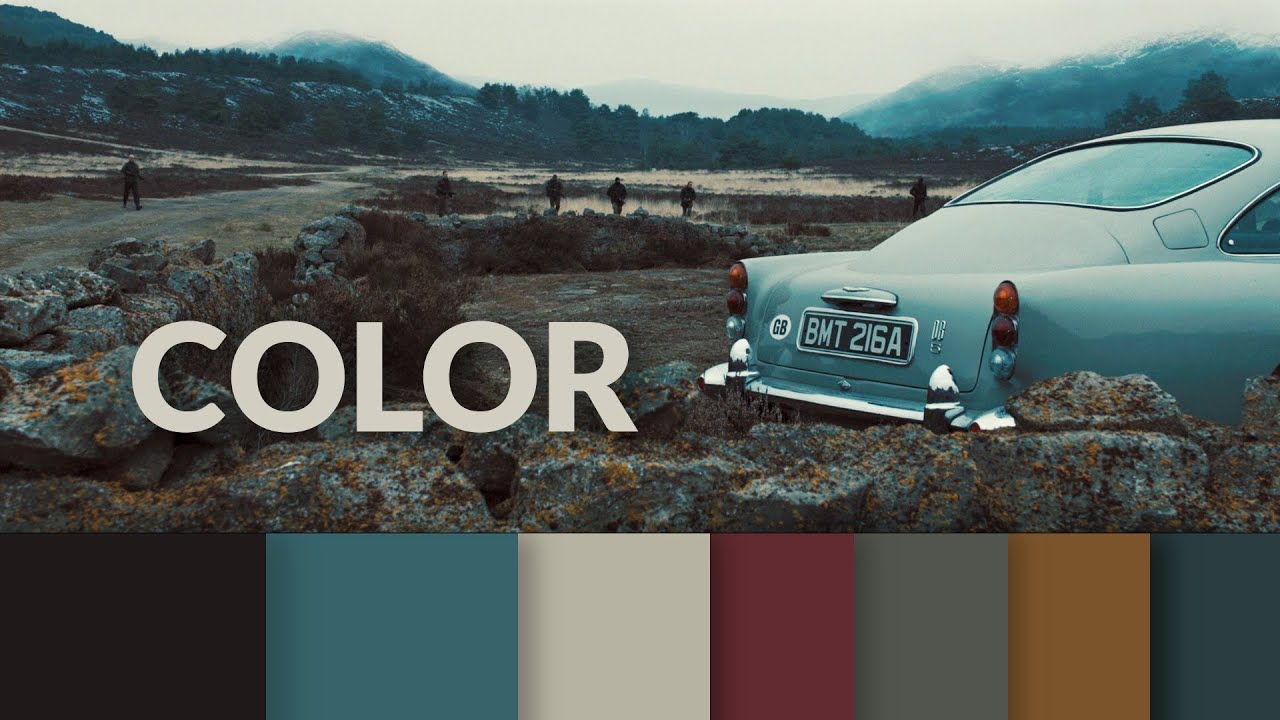
This is another orange and teal look except it's a "cooler" version meaning the temperature is coneys is cooler. This can be achieved by adding a blue tint so it bumps past your oranges a little more without completely overpowering the shot. Notice how the orange on the rocks is still noticeable. This also shows how color grades are never the same and they vary from film maker to film maker and shot to shot.
Here are some more examples of what different color grades look like on the same shot.


High Contrast is really important when trying to make footage look cinematic. You never see washed out, low contrast shots in film because it just doesn't look good. No, there is always high contrast that is balanced to make sure the blacks look black and the whites look white. Another way of creating contrast is using complimentary colors, colors that are opposite on the color wheel, in your shadows and highlights. Complimentary colors naturally contrast themselves and is one of the reasons the "Orange and Teal Look" is so popular.
I have already done a blog post on the steps in color grading and color correction so I won't go into that again, but for my interview with Jack I plan to use the "Orange and Teal Look" because I think it gives a cinematic look while also creating a fun atmosphere with vibrant colors and if I wear to paint Jack I would use lots of color because he has a colorful personality.
Worklog:
Monday- Absent
Tuesday-Presentations and notes.
Wednesday-Presentations and notes.
Thursday-Presentations and notes.
Friday-Presented my MP3 project, presentations and notes
Thursday, April 5, 2018
MP3 Blog Post
Marking Period 3 Blog Post

This Marking Period I worked on my Jack Shepely interview for my "life on ADD" video documentary series. I watched a particularly interesting interview with Tash Sultana, a musician who struggle with drug abuse, that really inspired the way I laid out and designed my interview. In this blog post I will go through my planning process, the production of the interview, and an evaluation of what I did this entire marking period.
Planning / Production:
I went into this project with almost every single detail planned out, even to the smallest detail like my camera settings and what Jack was wearing that day. The most useful thing I think I did was make a check list of the things I needed and the things I needed to do in order to shoot my interview correctly and not have to come back and film it again. The interview went smoothly and Jacks way of describing his life with Attention Deficit Disorder was inspiring and beautiful. Below is the checklist I made for the interview.
Checklist
- 3 cameras
- 3 batteries
- 3 SD cards
- 3 tripods (already in studio)
- Lav mic
- Set up cameras 1, 2, and 3.
- set up lighting- Soft Box- Back light
- White balance all cameras to the same piece of white paper.
- Adjust exposure so its the same on all cameras
- Set Movie Recording Size on all cameras to 1280x720, 60fps
- Plug in Lav Mic to camera 1
- Attach mic to subject
- Ask subject to speak normally
- Adjust Sound recording on camera 1- balance audio levels so they reach 12.
- Focus cameras
- Start recording
- Ask initial Question
- Record interview
I printed out this check list and then wrote in the precise camera settings I need to set my cameras to in order for the best quality footage.
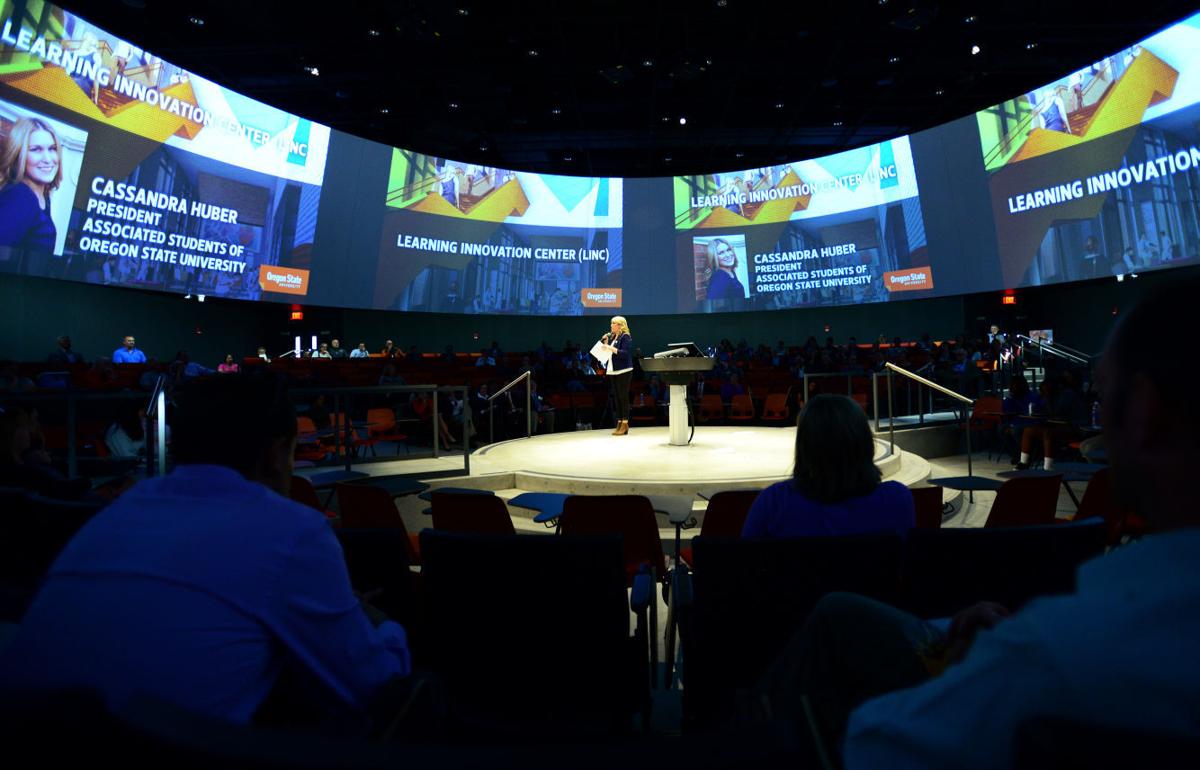
Some more pre-interview planning I did was workout where I wanted my cameras to sit in order to allow the multicam editing to flow and look professional. I ended up with three cameras and 3 different angles. Camera 1 was dead center with Jack focused on the center and symmetrical. Camera 2 was placed on my right but the subjects left and zoomed out more so some of the studio could be seen. Jack's left eye was at the right upper intersection point for rule of thirds and he was looking straight ahead. This angle was also at a greater angle than Camera 3. Camera 3 had a smaller angle and was placed on my left but Jacks right. This shot was in between Camera 1 and Camera 2. It wasn't in the center but it's angle wasn't as extreme as Camera 2's. It was a close up but not an extreme closeup like Camera one but not as zoomed out as Camera 2. This allowed me to get a variety of shots. Camera 1 really emphasized facial features and therefore the importance of the subject. Camera 2 gave viewers a look at the surroundings and included more of jacks body so viewers could interpret his body language and hand motions. Camera 3 gave a good medium so transferring in between shots was smoother.
Once I had planned, filmed, and downloaded my footage and audio onto my computer at home I began to storyboard my B-roll footage. I began with the intro and planned out how I wanted to start my interview, below is what i drew out.
Then I listened to the audio of Jack and drew in the angles for the interview shots based on his words and also B-roll shots I could get. I made it super detailed so I would know exactly what I needed to do when the time came to film the B-roll. I included the time in the audio sequence of when to switch shots from one to another or when to switch to/from B-Roll, and I included the times I needed to start playing my background music, when to pause my interview audio and let a B-roll sequence play, and when to resume everything. The times I wrote in the storyboard were followed by a word, that word corresponds with the audio and time and basically tells me to switch to that shot on that word in the interview audio when Jack says it. Thats how precise I made it. It was probably the most detailed and well thought out storyboards I've ever made. Below is the rest of the storyboard. I am missing the picture of the last five drawings but it isn't anything too special.
1

2

3

4

5

6

7

8

9


I also sketched out what I want my intro to look like and the different shots, angles, etc that I want to use
After I finished my storyboarding I downloaded my footage and audio into premiere and began to change the interview angles based on what and when my storyboard said. When I it came time in the sequence to switch over to B-roll or pause the interview audio I added in Legacy Titles that gave me instructions on what to do at that point. I also downloaded one of Jack's band's songs, Room by The Broken Straps, onto my computer and into the project. I got permission from the band to use it in my film. The I put it into my sequence at the place my storyboard told me and adjusted the interview audio and "Room" audio so that I could still hear jacks words.
Another thing I did was go into the EQ effect and messed around with the levels in order to get rid of the background noise and hum while also not warping jacks voice.
Another thing I needed was an actor release form. This was especially important because if the film turns out well then I may enter it in some film festivals over the summer. I need a contract to make sure there will be no legal issues with him and his band using his words and their music in the future. Below is the actor release I got him to sign.


Here are so more things I learned and researched throughout the last few months:
Flat Shots = Profession
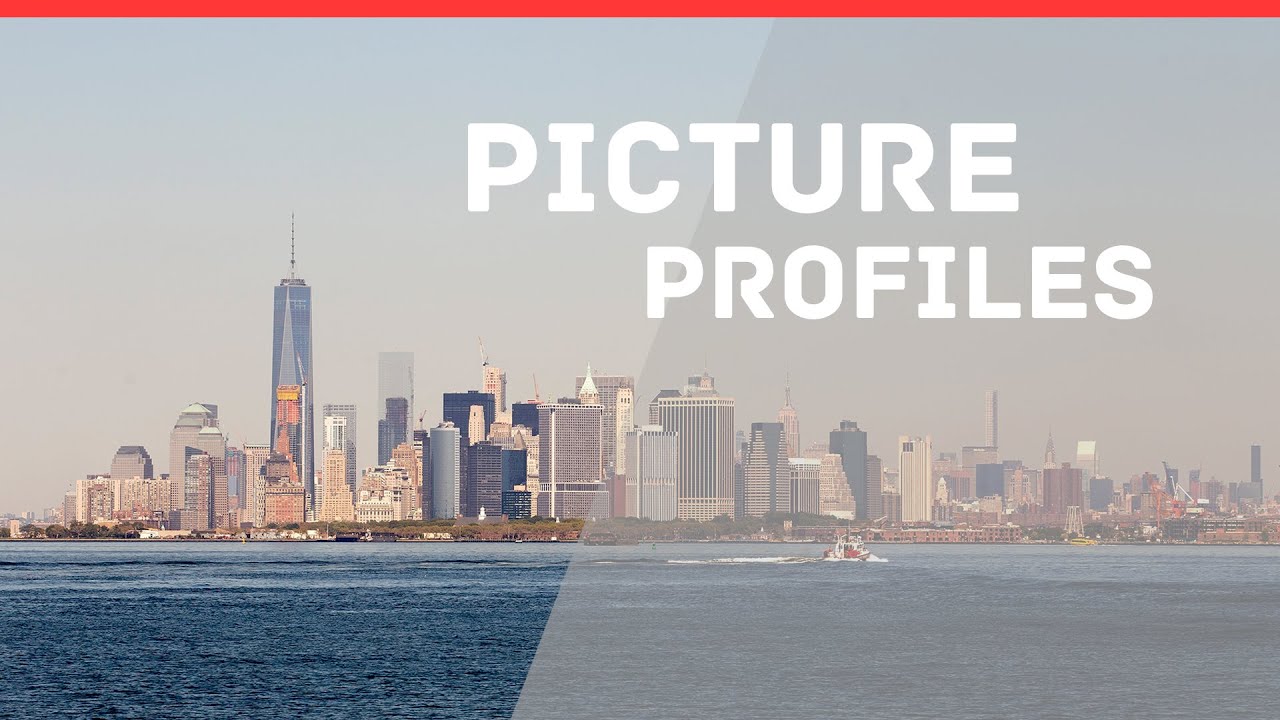 Flat footage does not look good right off the back but it makes editing in post production much easier because you are not restricted by colors, exposure, or contrast that get in the way when you aren't filming in a flat picture profile.
Sharpening too much in post production can create lumpy footage.

Depth of field:
The smaller the depth of field the blurrier the background and the more cinematic.

Evaluation:
Video:
Below is the organization video that i previously talked about. It is the interview without the B-roll and I put in legacy titles to show what to do/add/delete when I finally get the rest of my footage.
Start 1:12
End 4:44
Subscribe to:
Comments (Atom)